Drawing can be intimidating. I don’t consider myself an artist, but there’s an emerging world of sameness happening around us. Everyone is reaching for the same Unsplash and generic stock photos.
You might be surprised that searching for a stock photo takes about as much time as sitting down to draw something original and one-of-a-kind. I’ve done it far too many times in my years as a designer.
The problem with stock photos is it never feels right. So using an app like Procreate is a perfect place to start drawing digital art, because of how approachable it can be. And you can’t get easier than tracing photos.
So here’s a quick drawing tutorial on how to draw a few unconventional and cool things with Procreate.
Drawing Guide
First, what is Procreate?
If you’re new to drawing ideas using Procreate, you’re in the right place. And if that’s not news to you, you can skip to the Procreate Drawing Ideas section. (I just saved you 20 seconds, you’re welcome).
I use Procreate to draw digital illustrations for my blog and newsletter articles, giving them a sense of personality. Some people call this digital painting but I find that a bit dated like talking about how we used to surf the web.
The Procreate app is a digital drawing app built for Apple’s iPad. It’s helpful to use a stylus, and I prefer the Apple Pencil. I currently use the 2018 12.9” iPad model (3rd Gen) which has a bit of extra space. You can still use Procreate on older models, even the smaller sizes.
Procreate allows you to use pencils, pens, ink pen, brushes, acrylic, oil, and watercolor brushes. Anything you can imagine, you can draw. You can even export full videos of your entire image at any point.
Go from zero to one with the Procreate app
If you’re a beginner, the Procreate app interface can initially feel overwhelming. And you might be inundated with the amount of Procreate tutorials available to you. But, there’s just a few essential tools to help you learn how to draw. Here’s a quick and dirty tutorial to start drawing with Procreate immediately.
Skip ahead to the drawing ideas section if you already know how to use the app.
Interface tools
Canvas
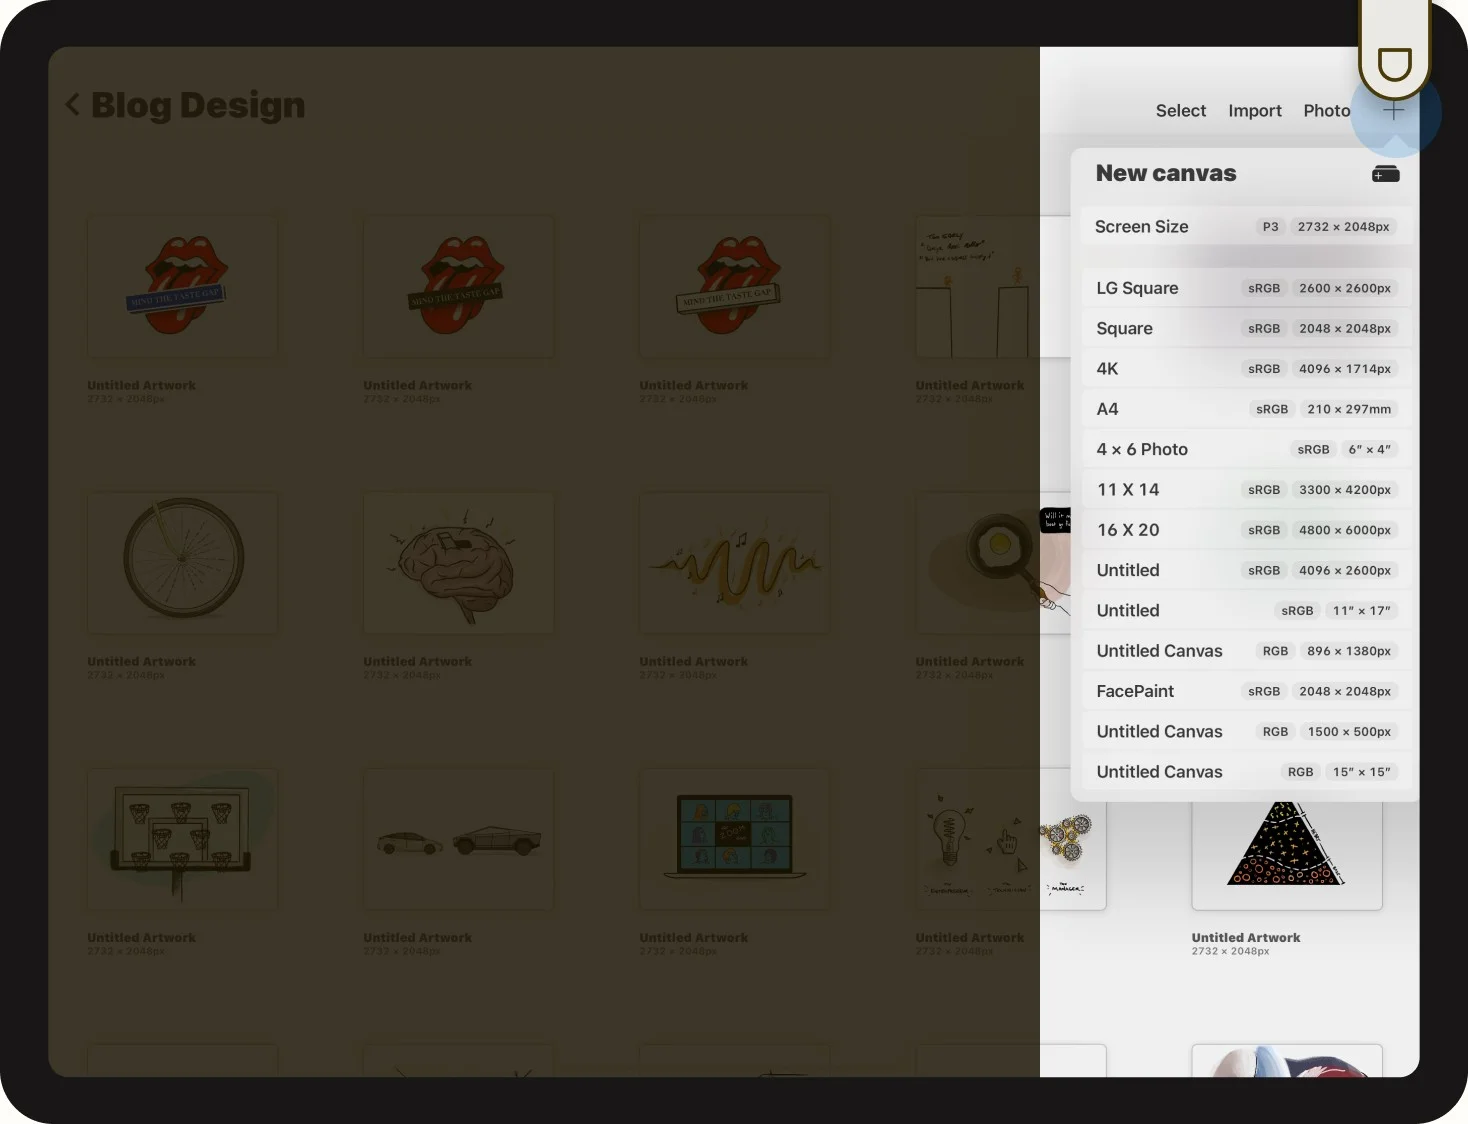
For my illustrations, I always start with a new canvas set to the screen size. You can always crop or downsize the canvas later if need be. From the main screen, tap the ”+” icon in the top right to reveal the popover menu.
Undo Shortcut
The most commonly used commands when drawing. You’ll want to test ideas quickly this way, and being able to undo experiments will help you along the way.
-
Undo: Two-finger tap anywhere on the screen to undo the last action.
-
Advanced: Hold two fingers down on the screen to advance more quickly.
Redo Shortcut
Similar to redo, to undo you just need to use three fingers.
-
Redo: Three-finger tap to redo the last action.
-
Advanced: Hold two fingers down on the screen to advance more quickly.
The actions palette
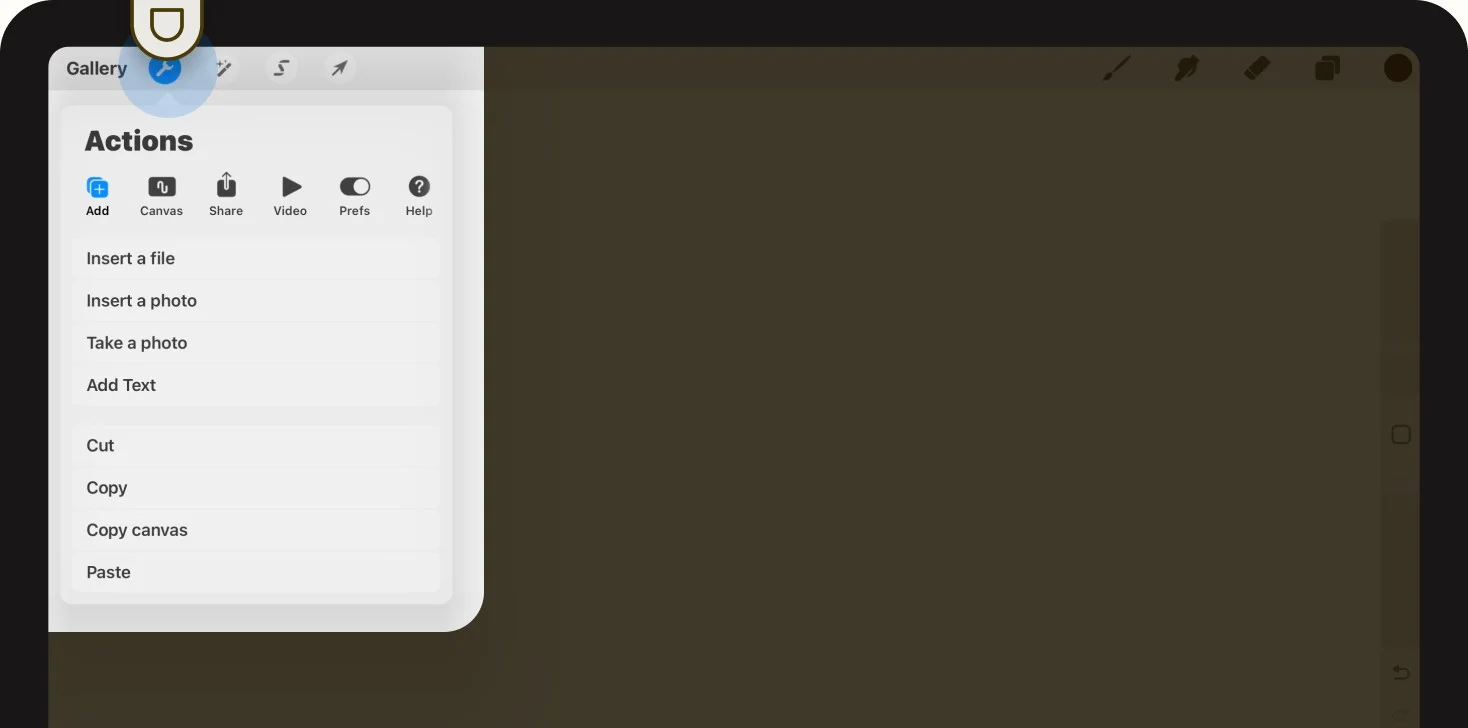
The actions palette within Procreate contains important things like adding external photos, sharing, cropping & resize your canvas, and video playback.
I usually open this menu at the start of a project to import a photo, or at the end of a project to share the photo.
Transform tool
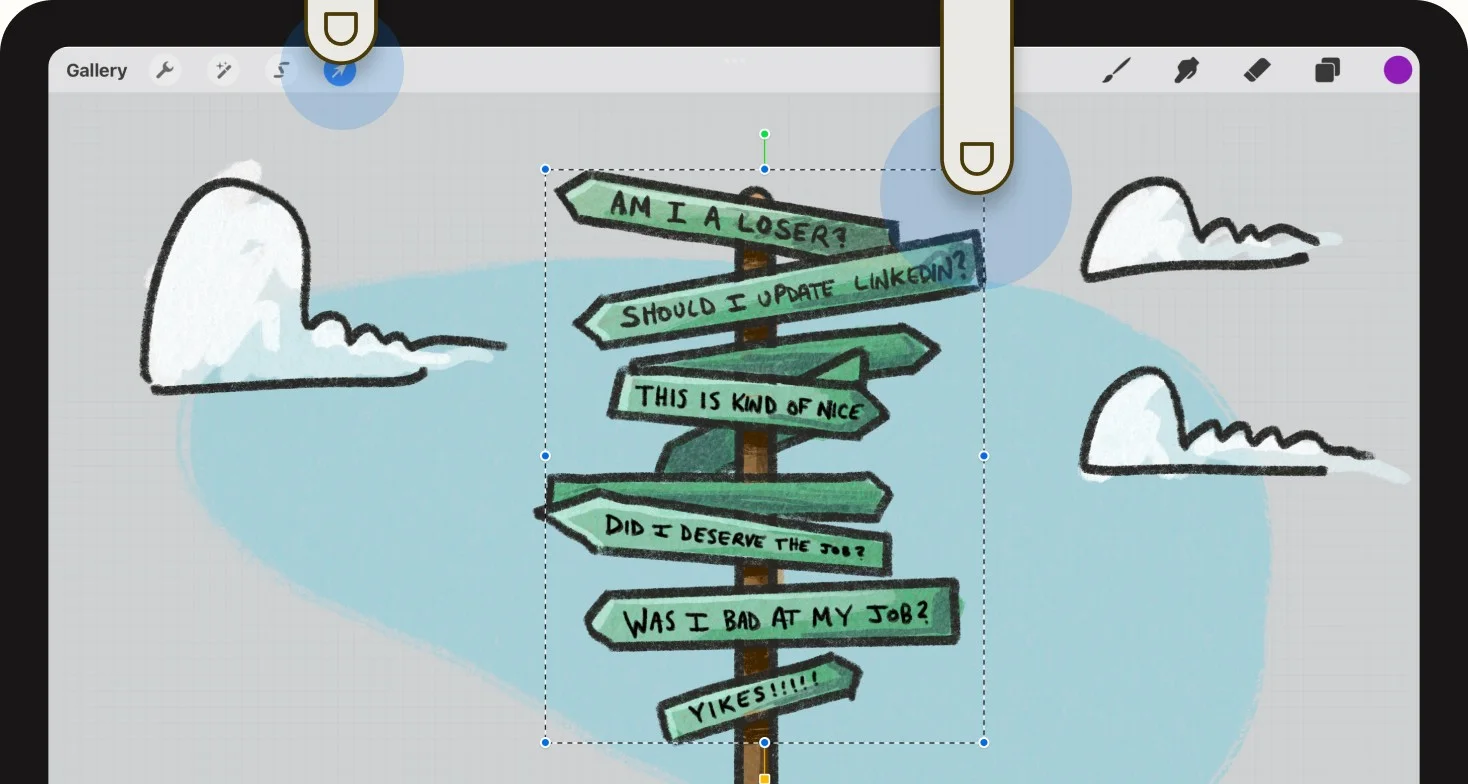
I use the transform tool when I am importing external images and need to resize, or if I need to resize the selected layer of my illustration.
To use the transform tool:
-
Tap the arrow icon shown above from the toolbar.
-
Drag from one of the four highlighted corners to resize.
-
To rotate, tap and drag the green circle at the top of the selected layer.
Layers
Layers are the cornerstone of improving your more advanced drawing skills. If you were to draw everything on one layer, it would be difficult to separate your outlines from your color, your foreground from your background, or your lighting effects.
By keeping objects or sketches in their layers, you’ll give yourself more flexibility later on.
How to create and delete new layers:
-
Open the layers palette in the top right
-
Create a new layer: Tap the ’+’ sign in the top right to add a new layer
-
Select the layer by tapping anywhere in the layer cell.
-
Hide the layer by tapping the checkbox on the right of each layer.
-
Delete the layer by swiping left on the cell, and tapping the “Delete” button.
Procreate brushes
Brush library
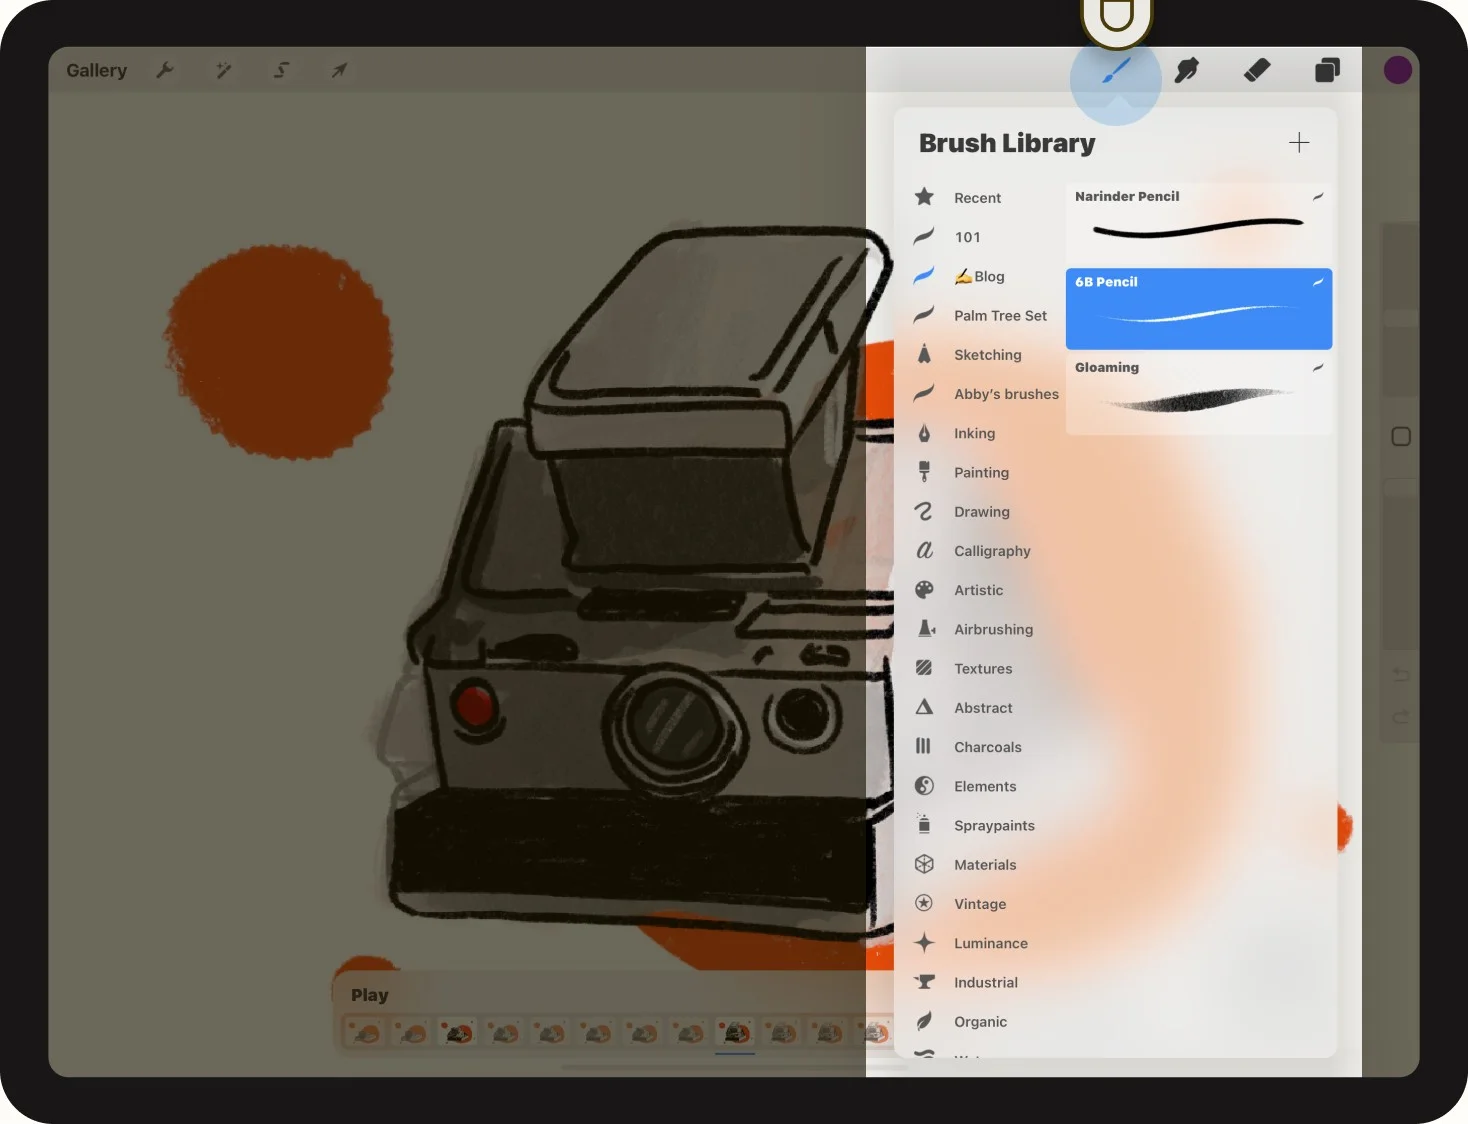
The Procreate brush library not only contains brushes, but pencils, pens, materials, and effects. But opening this library can be confusing and overwhelming.
I ignore about 97% of what’s included here, and I recommend picking 2-3 of your favorites and stick to those. As you can see, I even created a folder for the ones I use on my blog, so I don’t need to search for them every time.
Here’s my recommendation:
-
Pick one pencil for sketching. (I use the 6B pencil)
-
Pick one natural brush for brush-like strokes. (I use the Gloaming brush for color)
-
Pick one pen/pencil that has confidently defined edges. (I use the Narinder Pencil, but many people love to use the Studio Pen. (It’s fun to draw pictures with it!)
Brush opacity and size
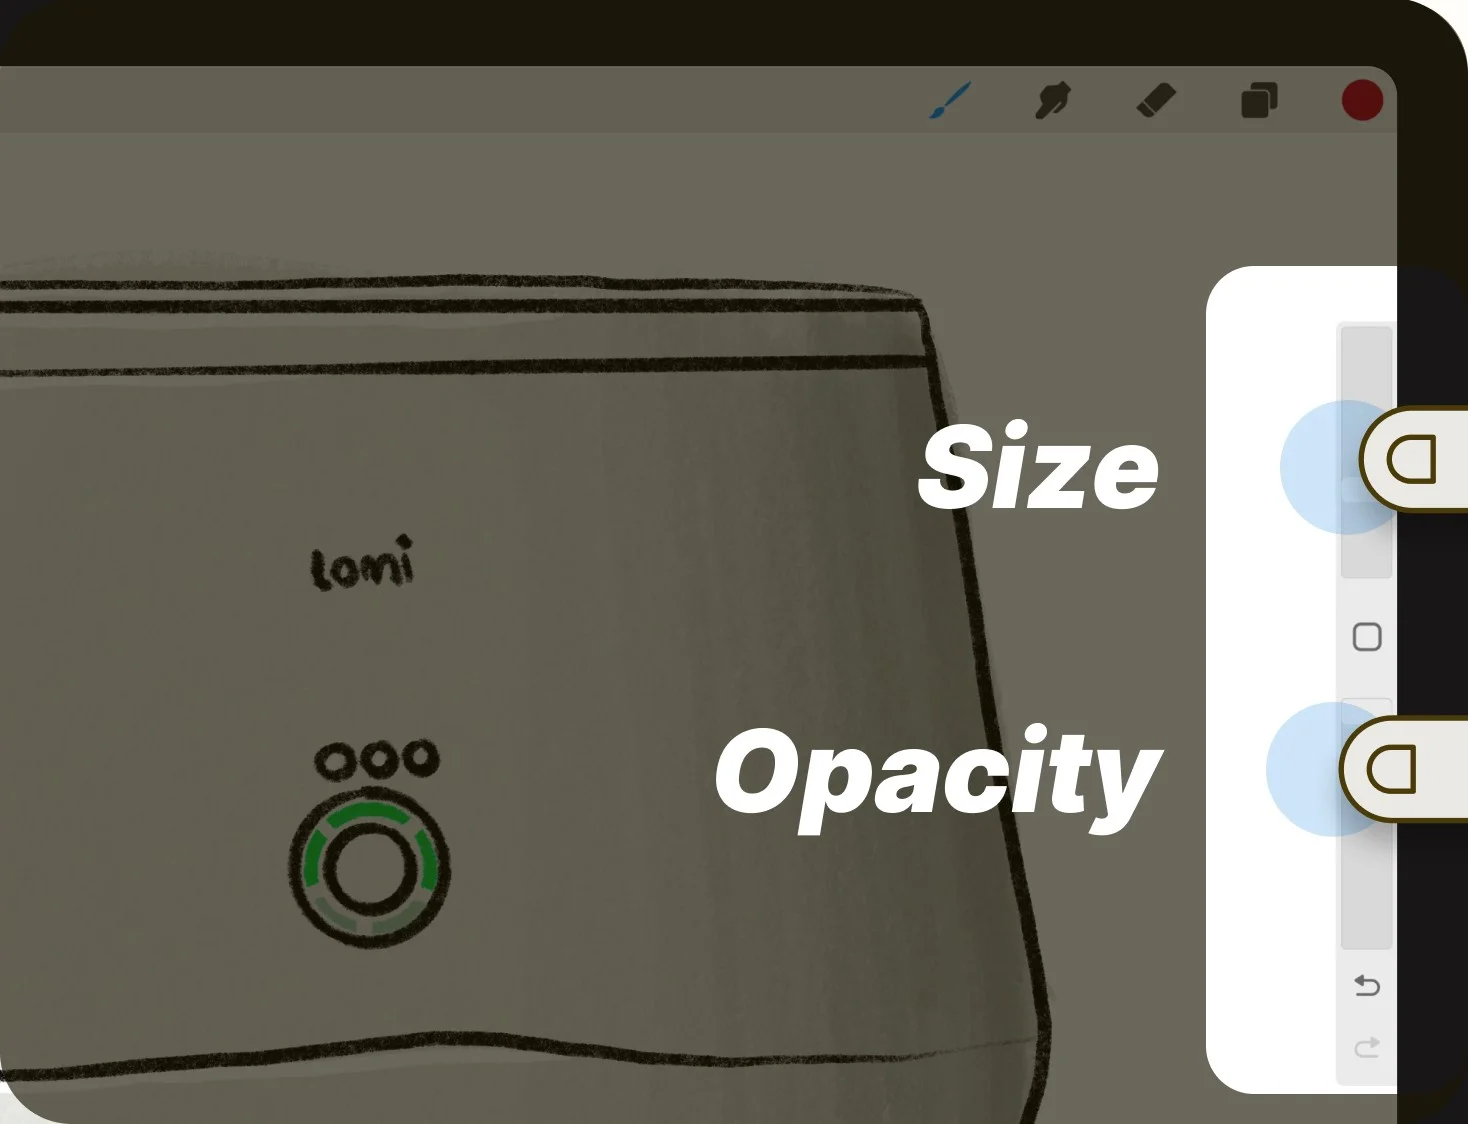
On the right side of the app (or left side depending on your Procreate setup), you’ll find two sliders affecting both brush size and opacity.
The top slider affects the size, and the bottom slider affects the opacity. Tap and hold either of these to adjust the settings before drawing, and you’ll inherit those settings when you draw.
Eraser tool
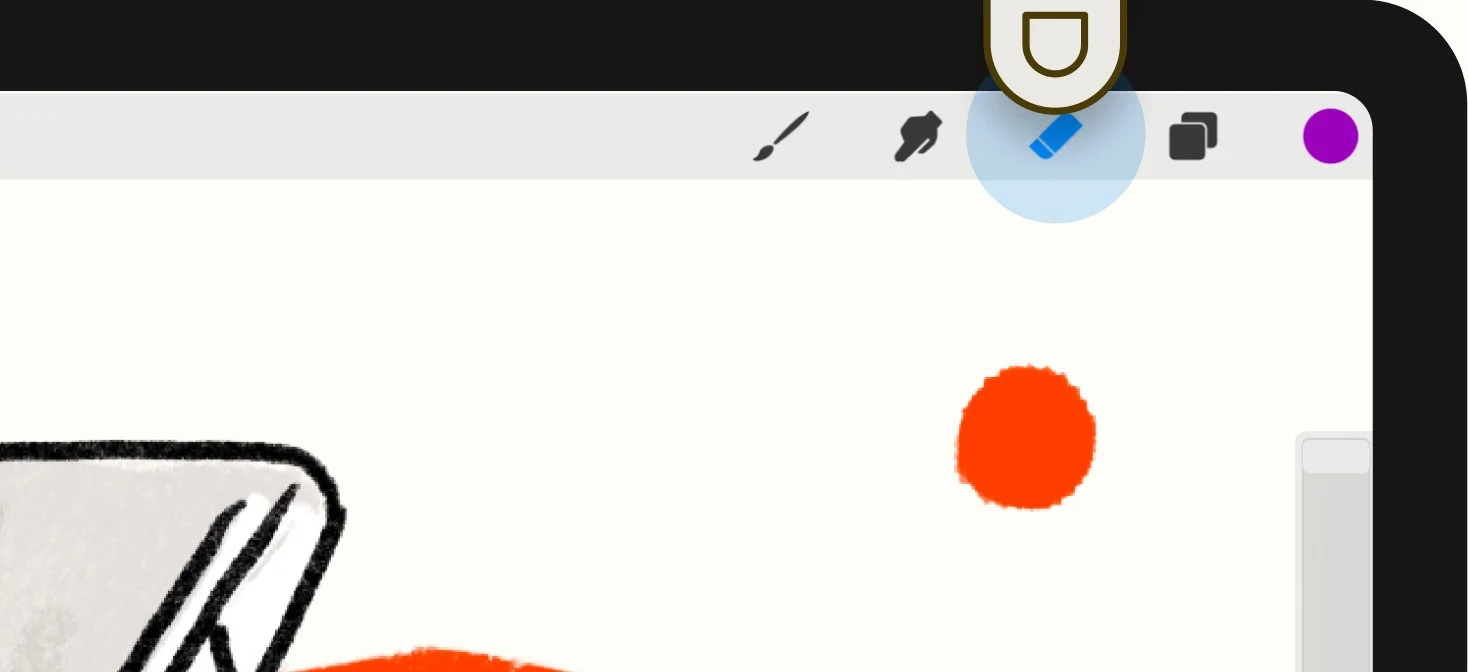
You’ll end up using the eraser tool quite often, and it’s conveniently located in the top right of the interface, next to the layers icon. Simply tap it once to use it immediately, or tap it again to open up the settings to use the eraser with a different brush.
Draw perfect circles, lines, and boxes
Drawing perfect lines and circles is useful when trying to draw charts or using perfect symmetry.
Draw a perfect circle
To create art with perfect symmetry, just draw a circle as best you can, then hold your pen or finger in place for a second at the end, and it will create a perfect circle for you the best it can.
Draw a straight line
To draw a straight line, draw a line from left to right and hold the pencil at the end while it smooths out any imperfections.
Draw a perfect box
To draw a perfect box, draw a square the best you can and hold your finger or pencil at the end to create the best box possible. It’s fun to do this quickly to create other shapes and lines easily.
To create straight lines at perfect 45-degree angles, just hold your finger and the pencil down at the end, and the line will snap to the nearest angle.
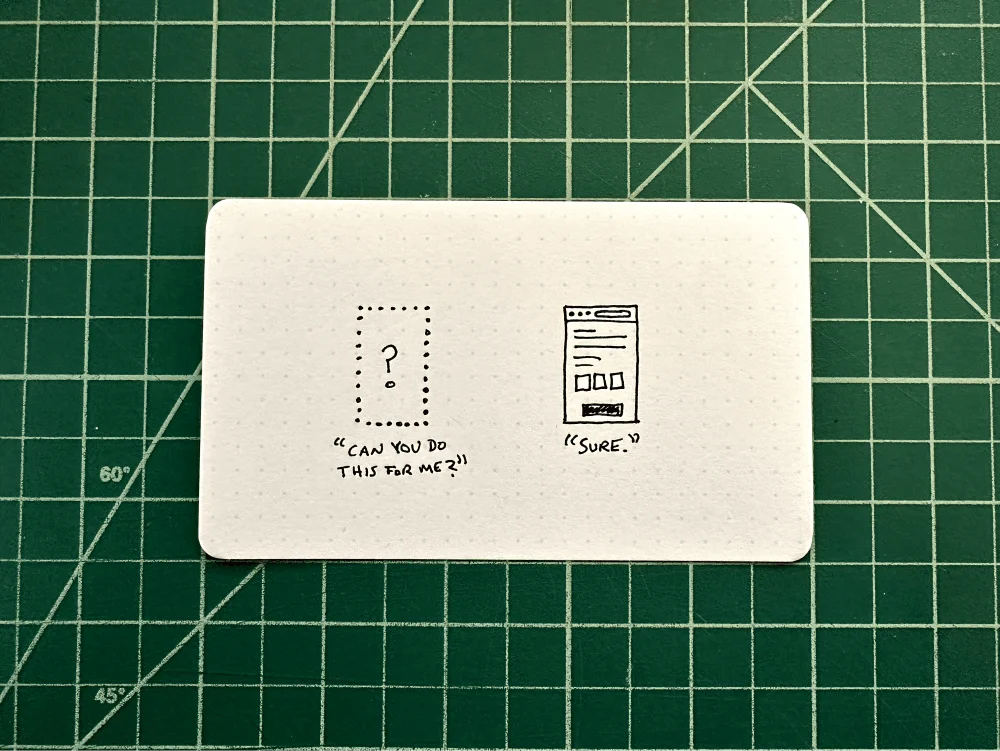
Why you should trace and remix
If you have ever tried to draw digital art on the Procreate app in the past—and given up—I want to present a different way of learning. The best way to learn cool things to do on procreate is by copying, or tracing in our case. We’ll be using digital photos, Google images, or ideas of stuff to draw to do just that.
We’ll also trace over text to get a feel for what hand lettering feels like.
I use this technique for my writing because it is difficult to draw ideas from brain to paper. If I need to draw a hand, I’ll take a picture of myself and trace them in my style. I find this helps me spend less time being frustrated, and more time creating successful pieces that I am proud to show off.
And isn’t this what matters when trying to create original digital art?
Where to find fun, unconventional creative Procreate ideas
There are plenty of articles that will show you how to find cool easy things to draw on Procreate. Flowers, abstract art, complicated landscapes, and other off-the-wall ideas that just aren’t that practical.
This article is not that.
We can find interesting concepts based on inspired photos you might have laying around, remixing photos together to create interesting compositions, shapes from your everyday life, or even your favorite articles. Inspiration is everywhere, and I think it’s much more fun to draw objects or ideas because they’re personal.
So this article will be a bit different. Our process is going to focus on using reference photos from my collection, or from related photos we find from around the web. We’ll bring those images into Procreate and trace those images in our natural style, creating something unique and original.
Here are four easy things to draw for beginners
Now that you know how the basics of the interface work, we can now dig into what to draw on Procreate.
Here is where we’ll explore pictures of cool things to draw on Procreate, using the methods I mentioned above. We’ll focus on using reference images and tracing to develop some original concepts so you’ll never have to use an Unsplash photo again. Digital art to the rescue!
By the time you’re done reading this article, you should have plenty of things to draw on Procreate, even if you don’t consider yourself an artist.
Hopefully you’ll have no problem creating original Procreate drawing ideas.
Idea #1: Draw digital art based on words from an article, a quote, or book you love
Much of the time, I need a reference photo and look to Google to find objects that I can combine to tell a visual story.
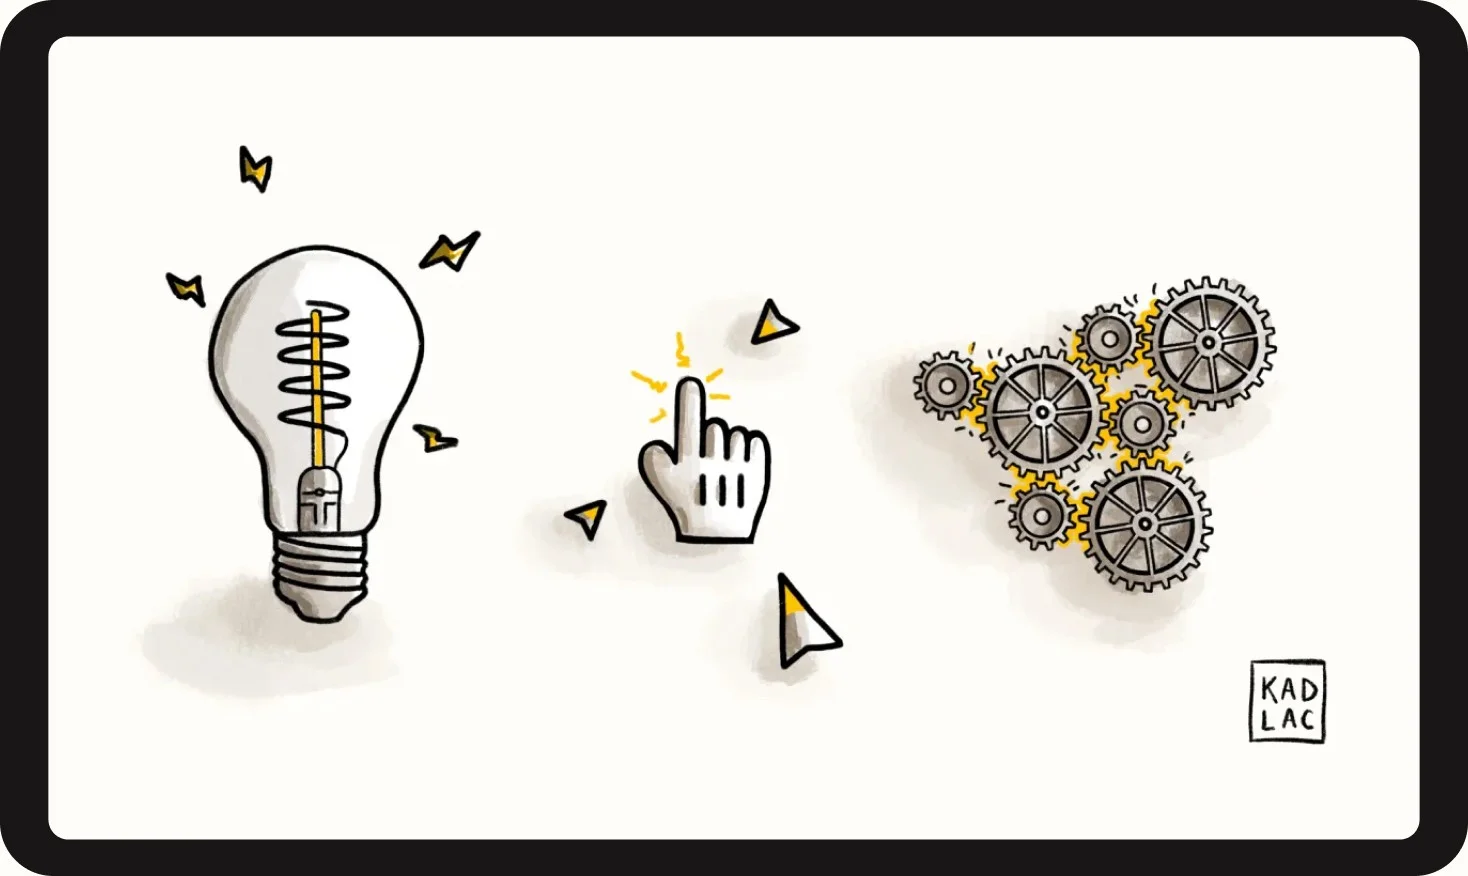
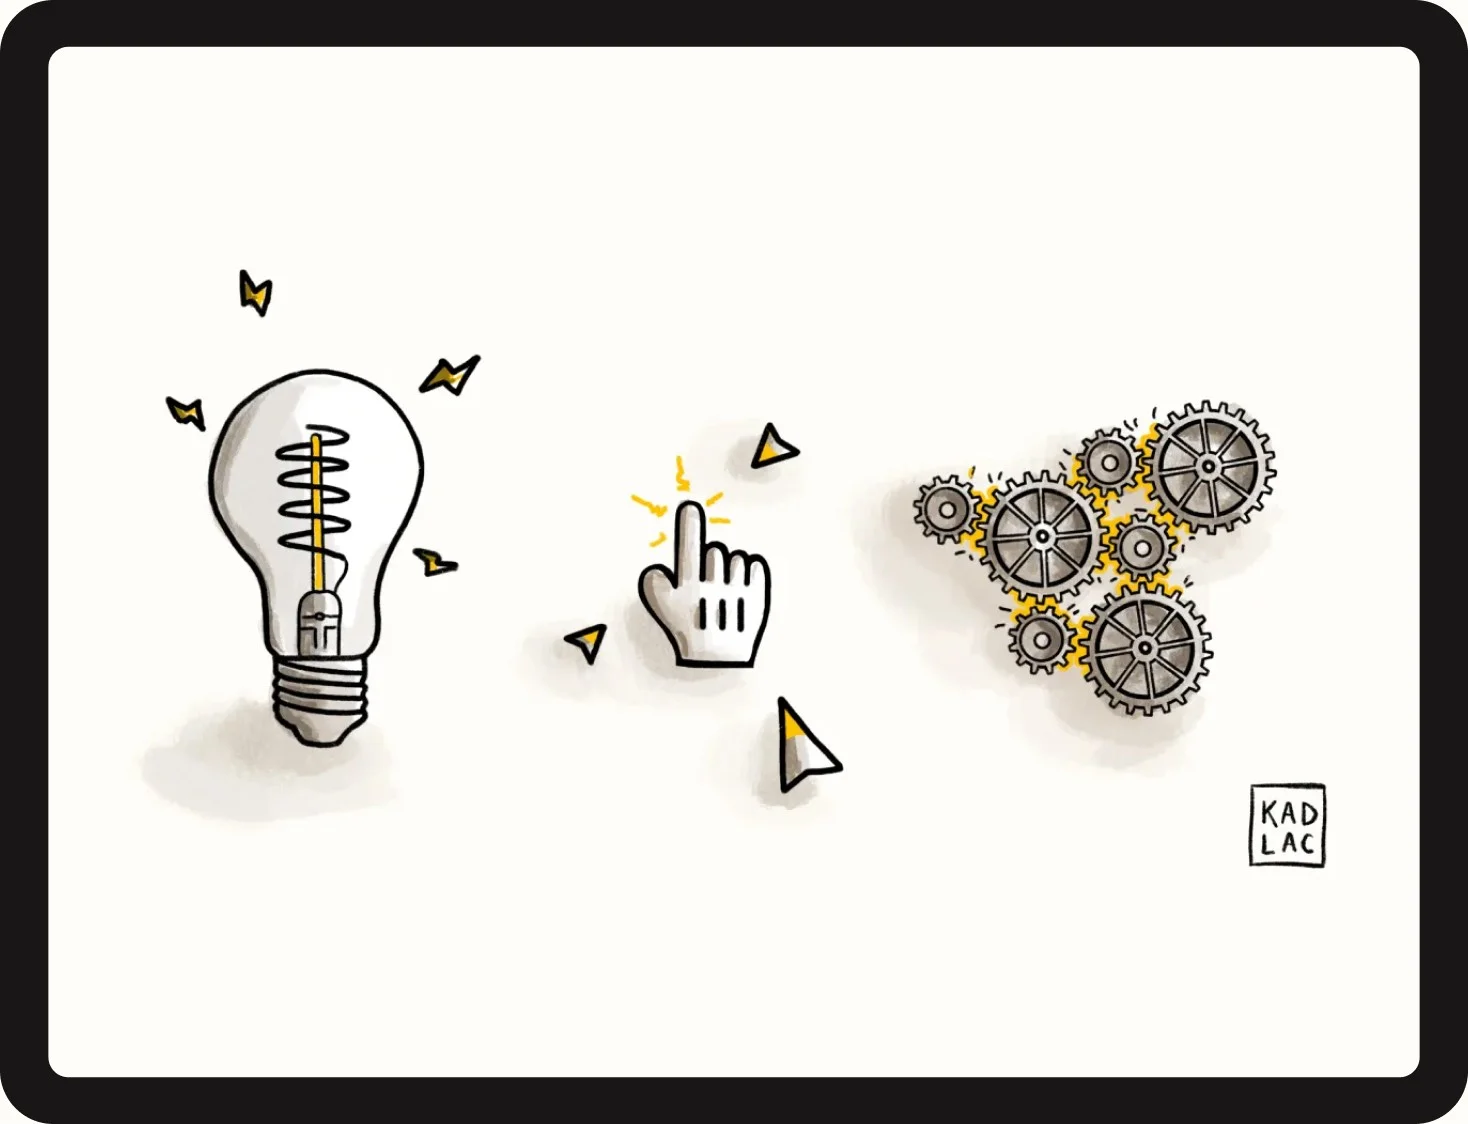
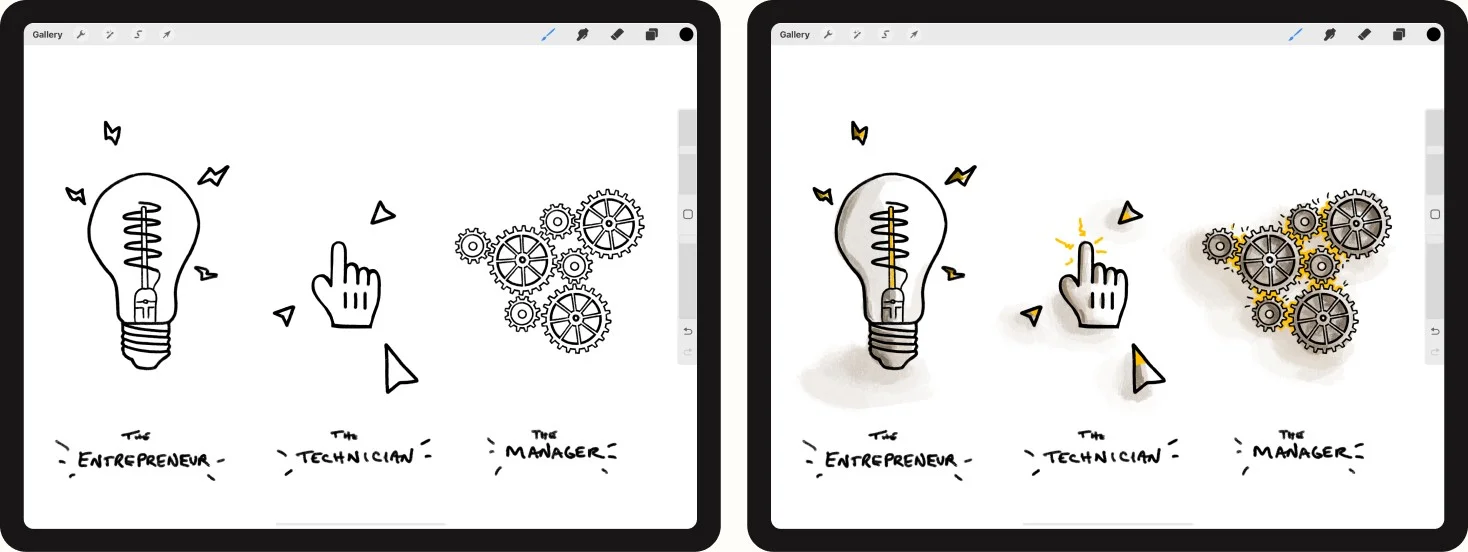
I finished reading the E-Myth and wanted to draw an illustration for the article I wrote immediately. The book centers around three roles: The entrepreneur, the manager, and the technician. This was a great starting point for thinking about things to draw.
I searched Google for Procreate ideas to draw, and created a composite that made sense to me. Then I traced them within Procreate. I imported the photos from my iPad, from within the Actions palette dropdown, then resized everything to fit on the art board in the order I wanted.
To me, each of the objects represents one of the characters and combining them in this order made for a nice and consistent look for the article.
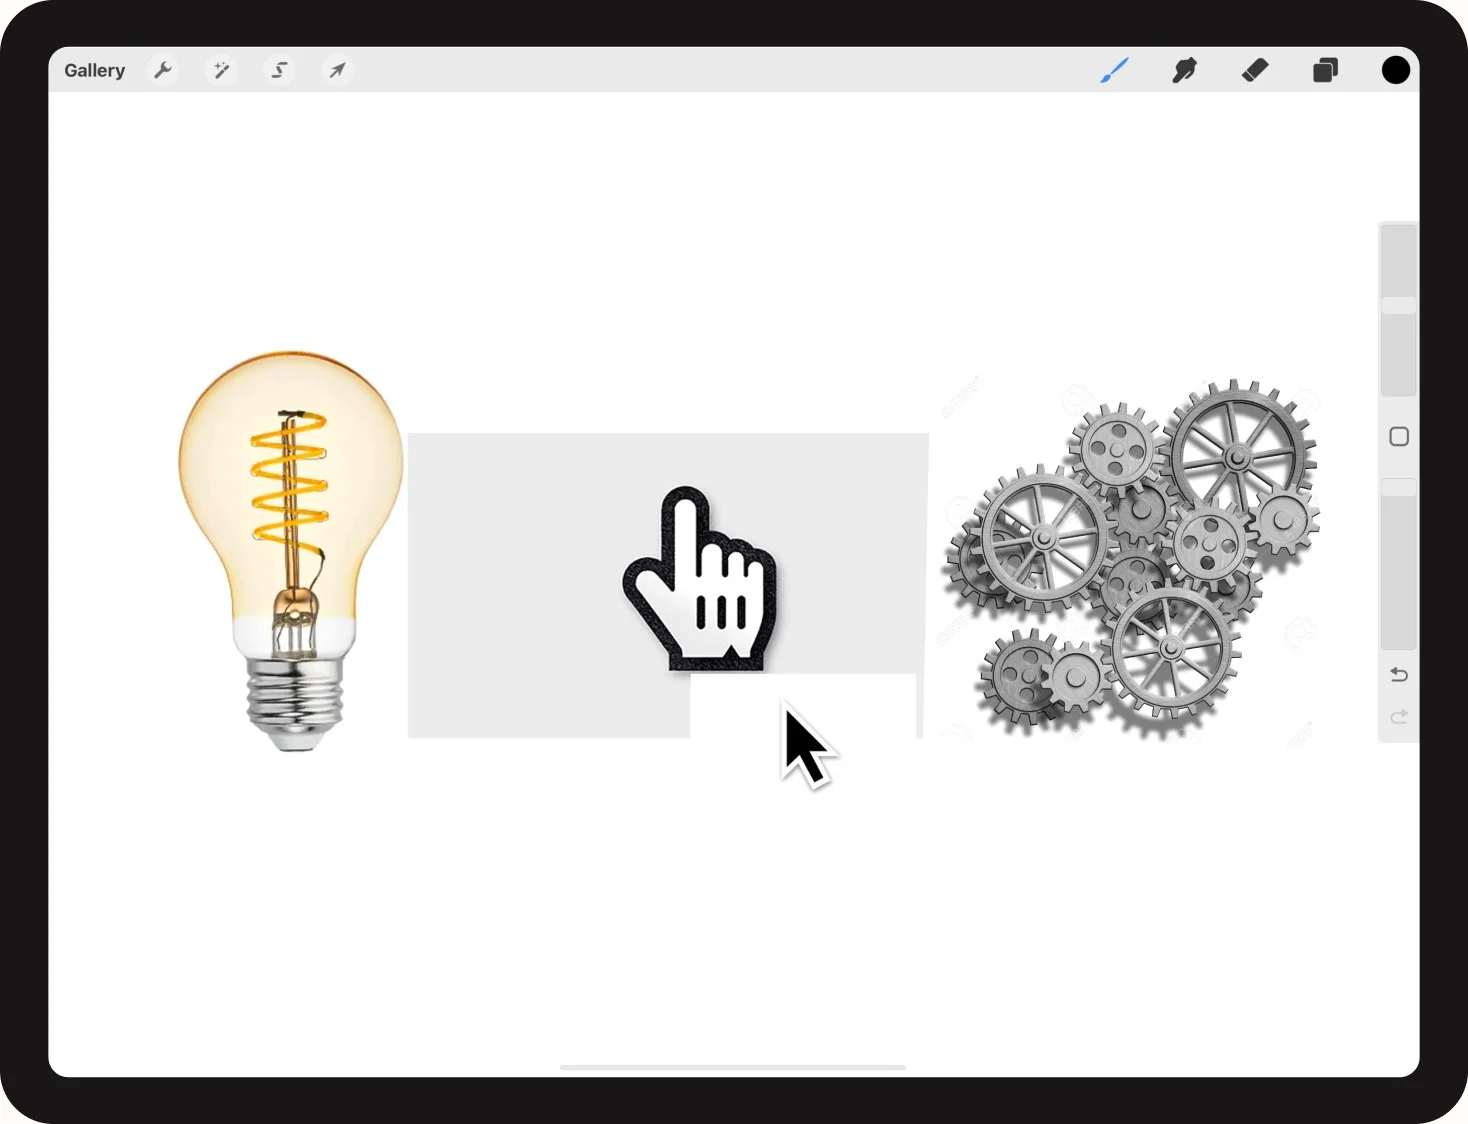
The next thing I did was to bring back the opacity on the images and trace them with a 6B pencil. You’ll see I just drew the outlines of the shapes, on the left, and then started to fill in the color on the right on a new layer underneath the outlines. Normally, I want to create a sense of story within the images I’m choosing.
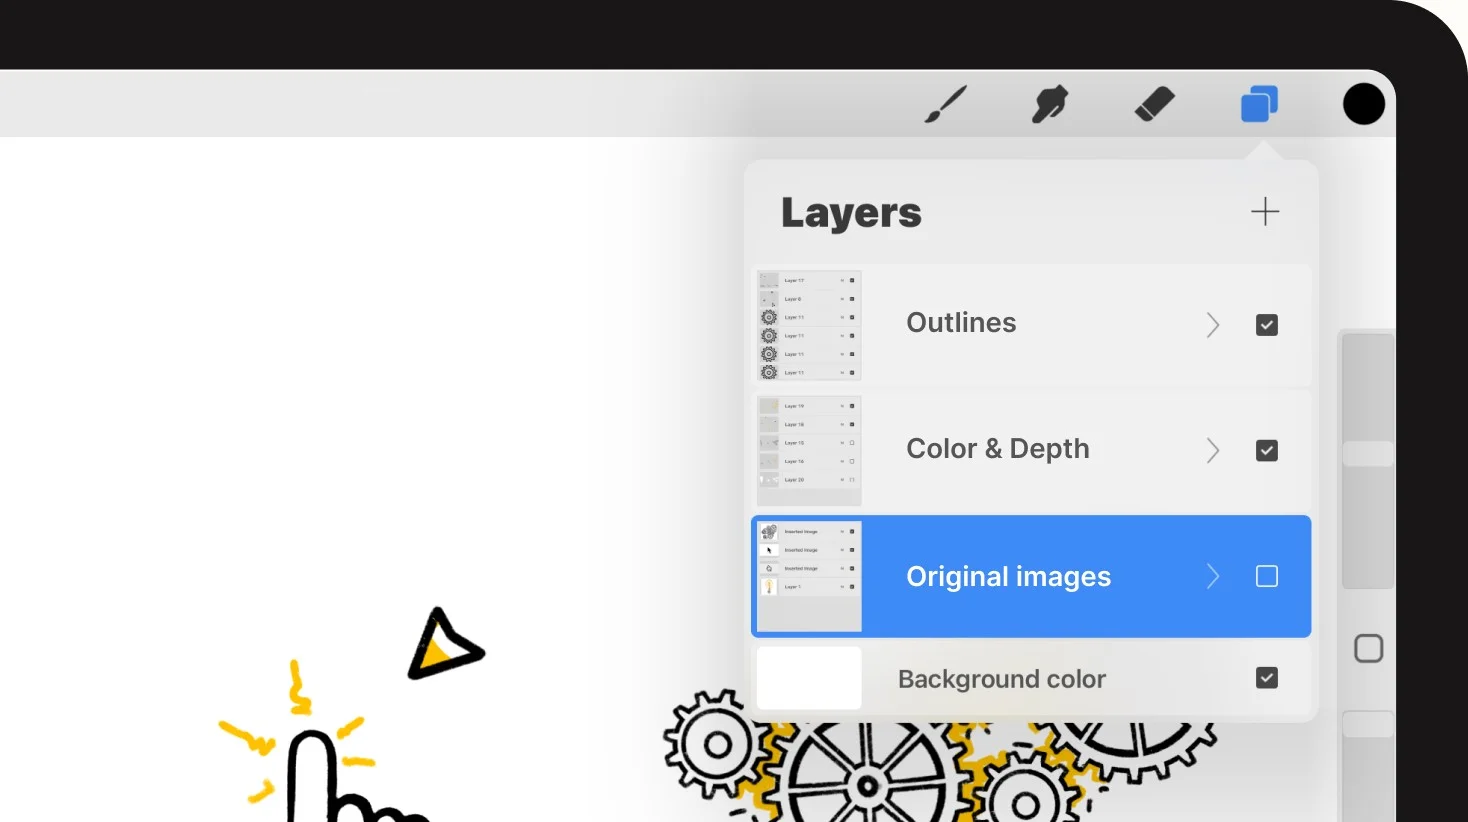
In the layers palette, you can see how I organized the layers and the groups.
After I am finished with the drawings, I hide the artwork on the bottom layer. To create a group, select a layer and swipe left on anther layer, then tap “Group.”
Finding Procreate ideas for your illustrations start with writing down several words that you can search for online. You should have no problem finding things to draw when you start to get your creative juices flowing with the process.
Idea #2: Easy drawing ideas from pop culture
I have traveled to Toronto half a dozen times to attend the Toronto International Film Festival (TIFF). I love movies, and I also love to draw some of my favorite scenes.
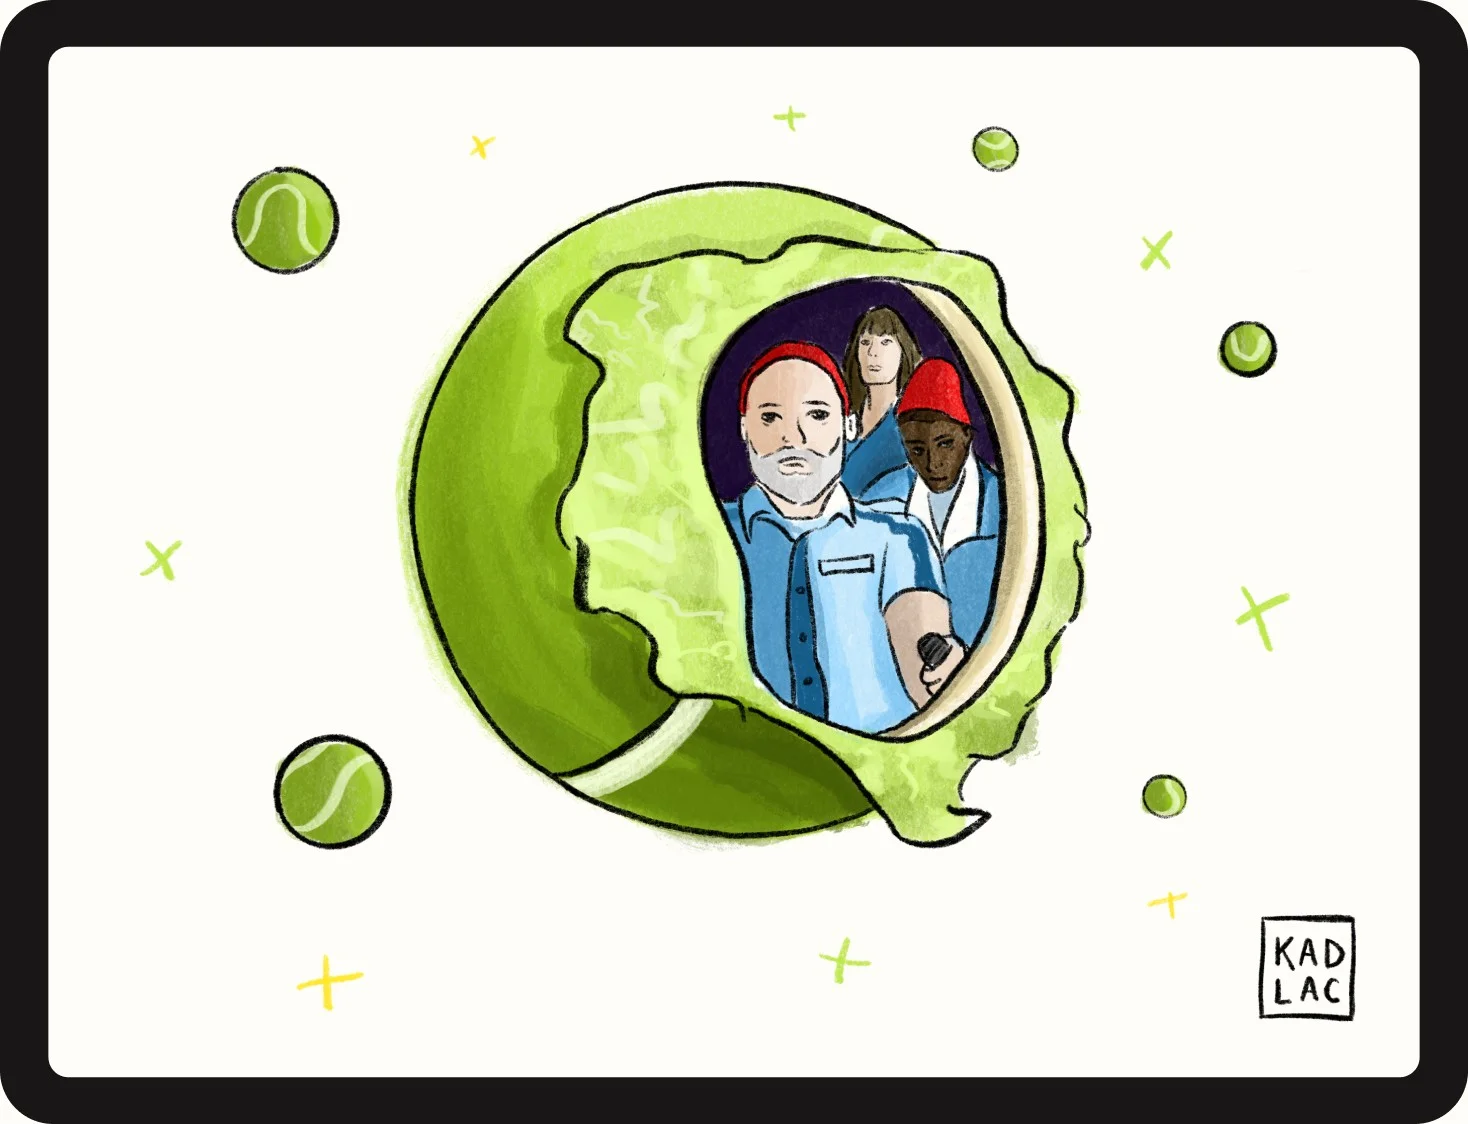
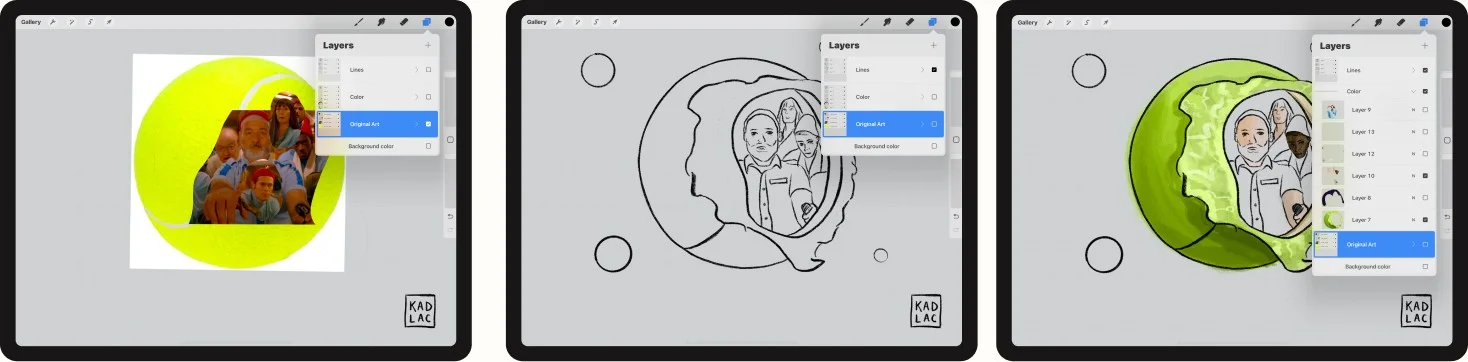
Like many, I love Wes Anderson. For this piece, I was writing about finding our creative nooks, and I wanted to remix a part of a scene with something that felt cozy. The tennis ball came to me quickly, and what if it was sliced open, revealing a creative image.
The next thing I knew, I was searching for Wes Anderson films, looking for a scene that had a nook-like feel. The scene from The Life Aquatic image appeared when they were in an underwater submarine type of machine, and I thought I could use that for this image. With some cutting and cropping, I composed a layout that placed them inside the tennis ball.
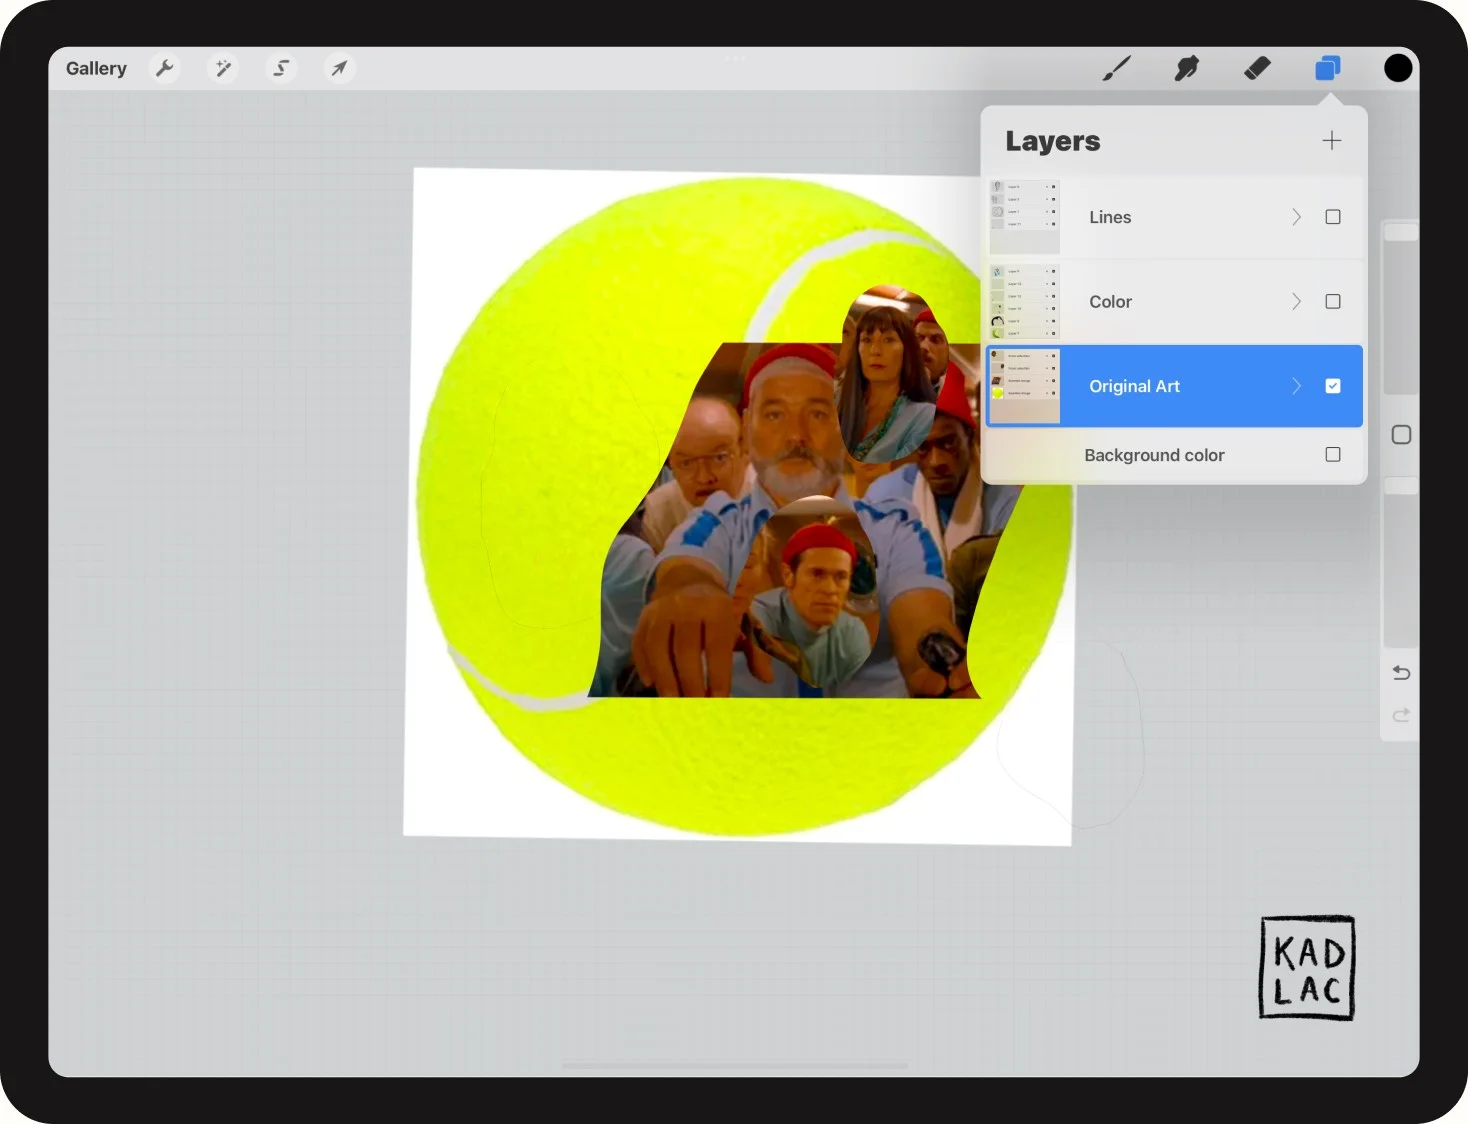
Below you’ll see the overall process of first sketching and drawing in the outlines from the composition I made with the original images. Then I add color underneath those layers, using the procreate brushes. I prefer to use individual layers for each colored object.
Part of the beauty of this process is knowing you can’t draw this from memory, but by leveraging an already constructed composition, you can trace almost anything in your style.
Idea #3: Draw your name or initials from a font
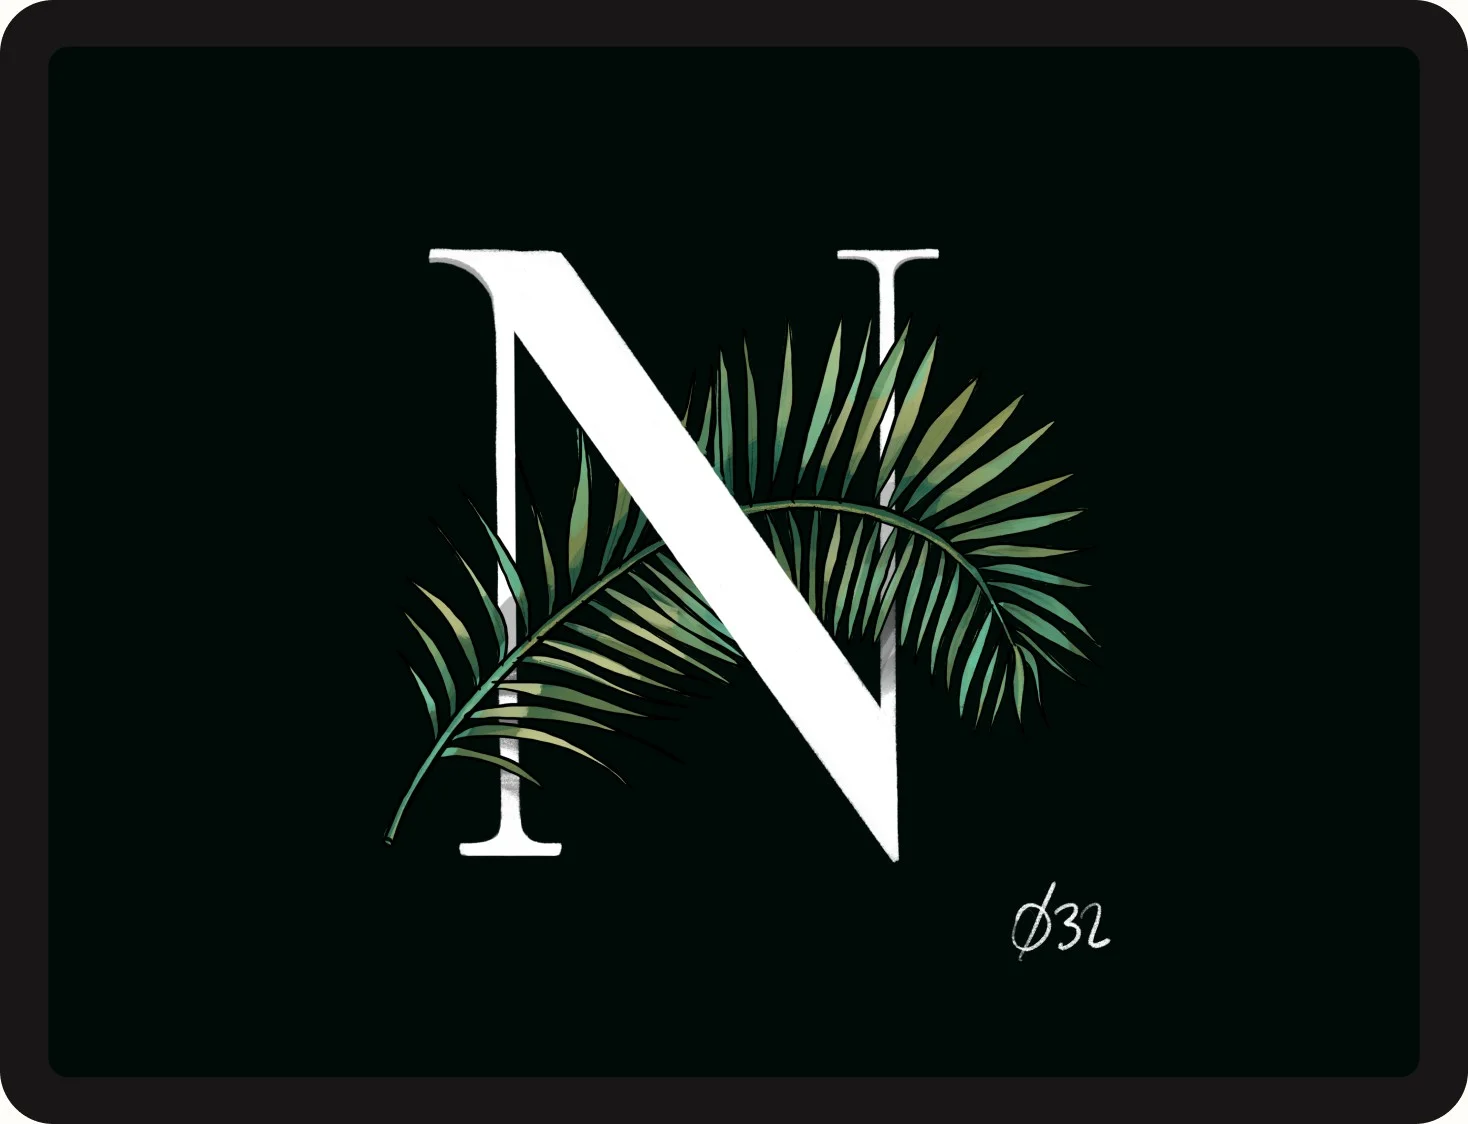
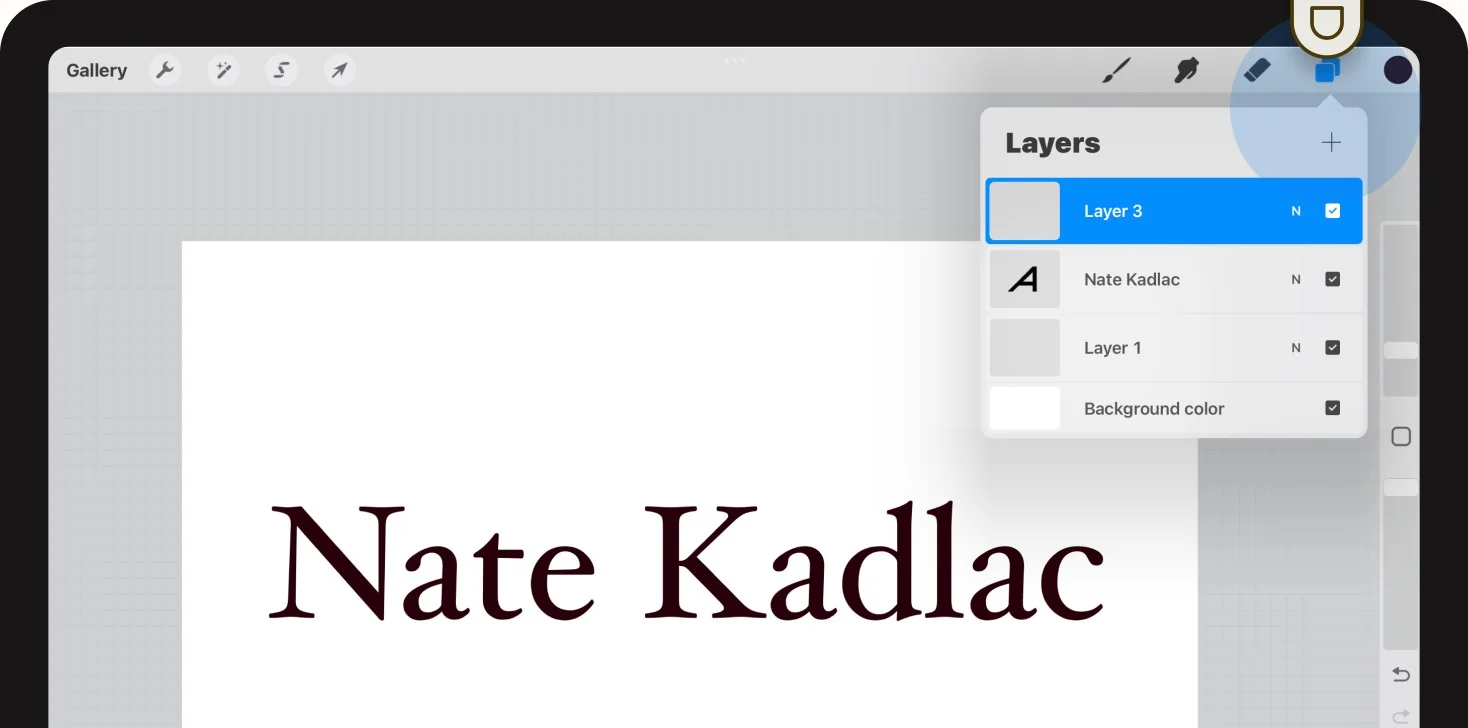
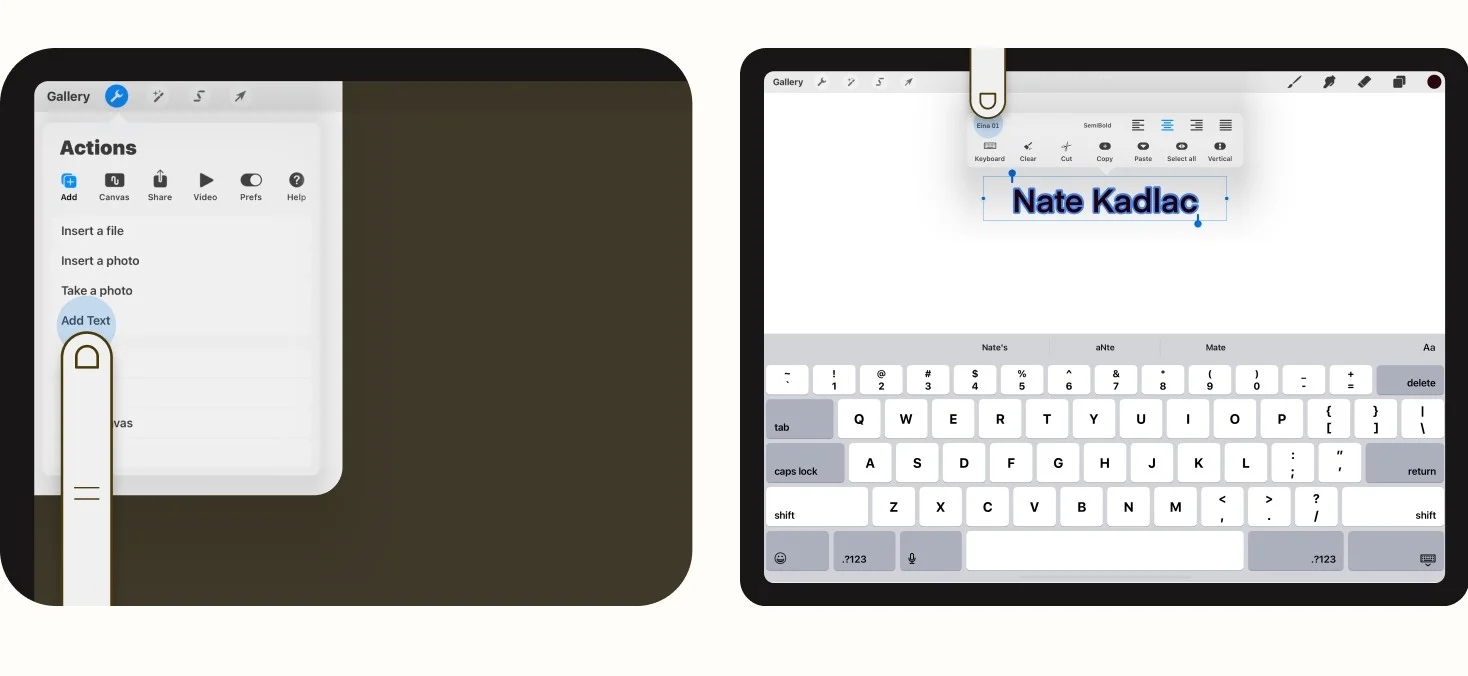
There’s no word more important to us than our name. And while you can draw art in the app, I will have you type out your name in Procreate. Then, we’ll trace over it, getting a feel for how drawing letters can be creative and fun.
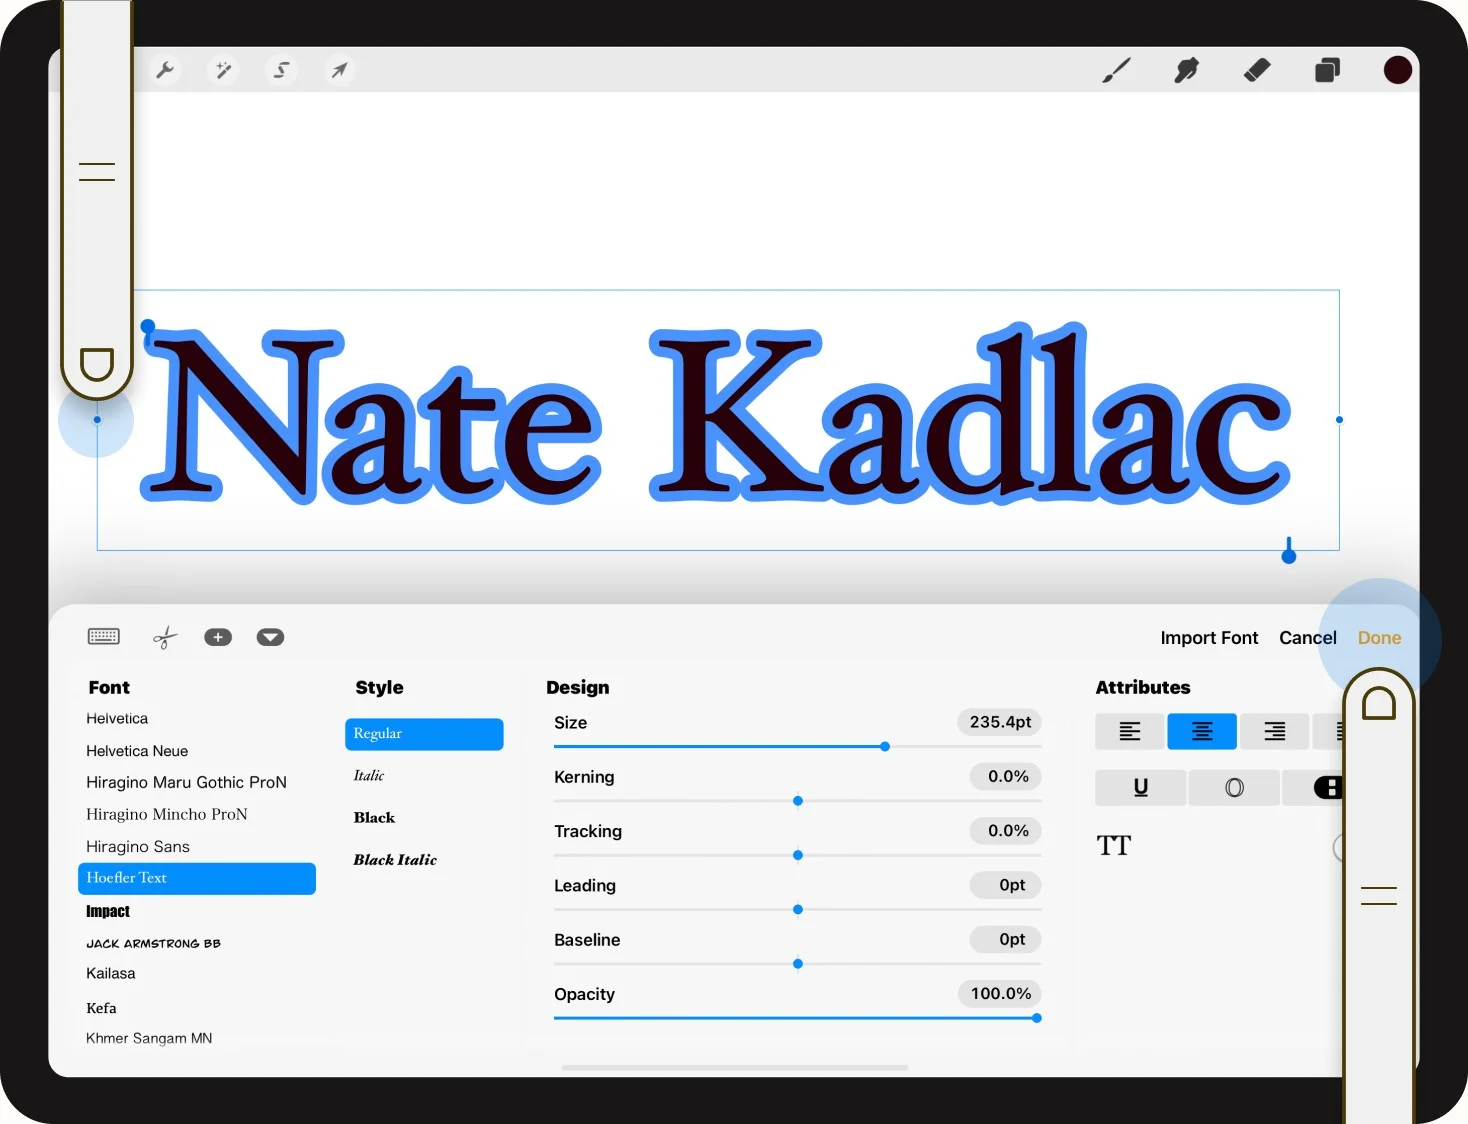
First, we’ll type out our names or initials using the text tool. Then pick a font that looks fun to trace. I chose a serif font since I’m drawn to their elegance.
Next, scale up your name to fill most of the canvas so we can work at a large size. We can always scale these down to use for our signature or headers of a website/newsletter.
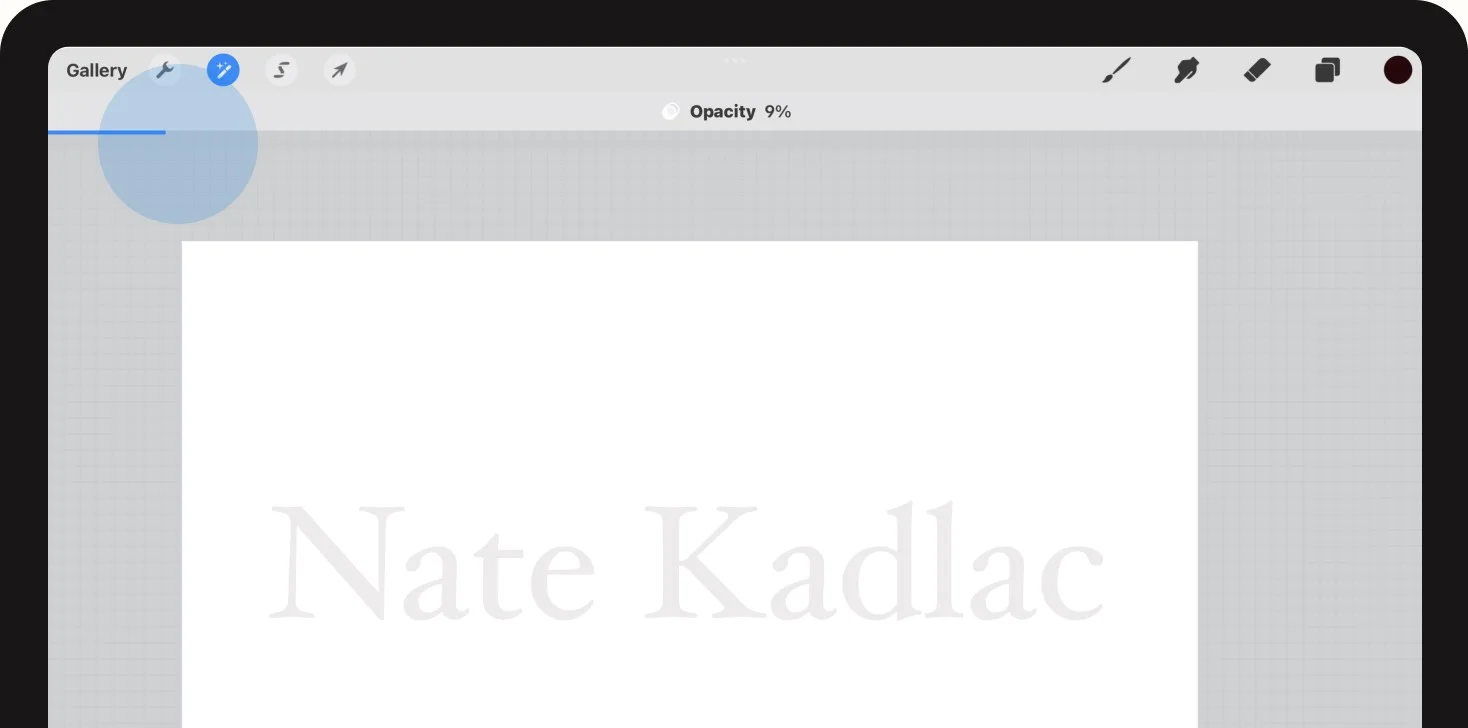
Lower the opacity of the layer by opening up the layer palette, then two-finger tapping the layer with your name on it.
Then you’ll see a slider appear along the top edge of the app, and just slide your finger anywhere on the screen from left to right.
You want to decrease the opacity just enough so you can see it, but fill in using your pencil or brush. I dropped the opacity of my drawing close to 10%.
Now you want to add a new layer and trace your name in with a pencil or pen. Keep everything in a separate layer so you’re not affecting the original, and you’ll be able to hide the other layers if you need to.
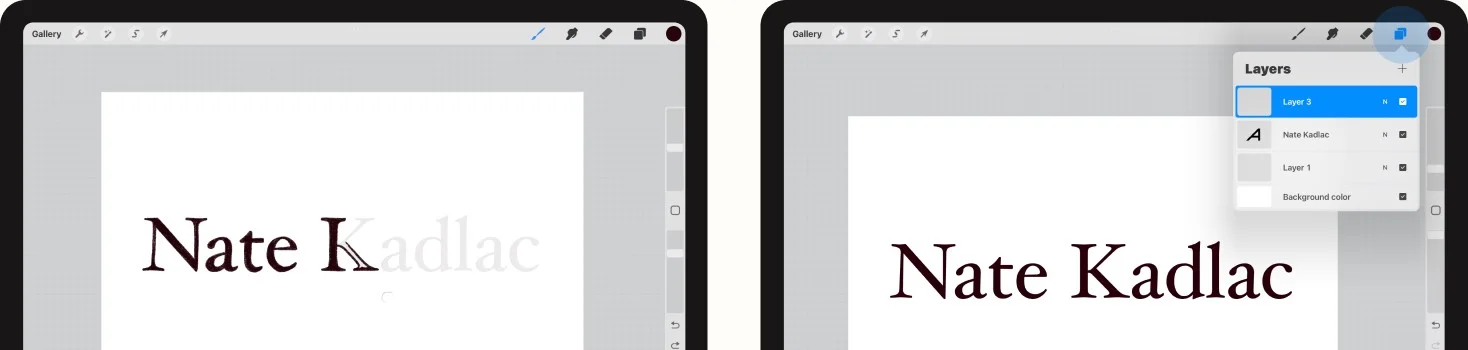
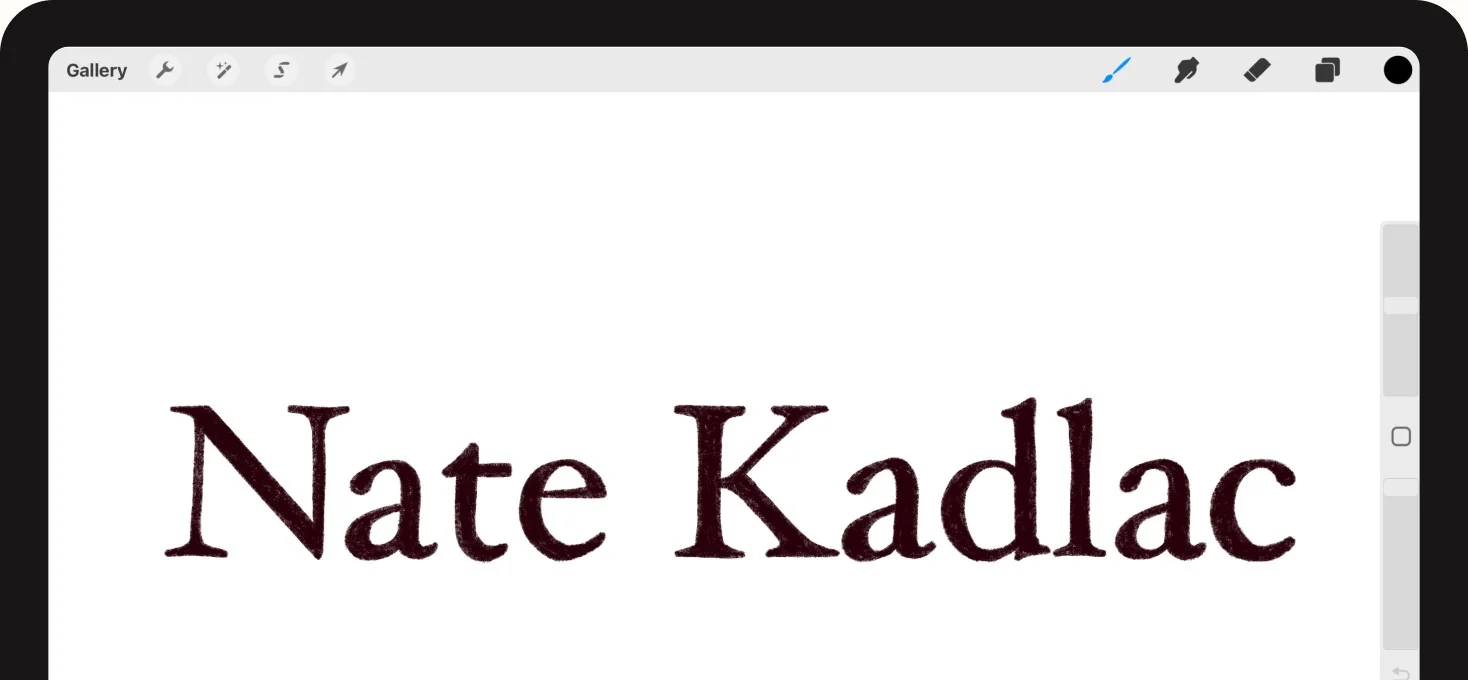
Now, you have your final name sketched out by hand, which you can use to personalize anything you need.
Other ways I use this is by creating my own signature in a digital format, and using that image for signed documents.
Idea #4: Drawing digital art from an image in your own photo gallery
Sometimes, you’ll have an idea from your own photo selection that could make a good idea for an illustration.
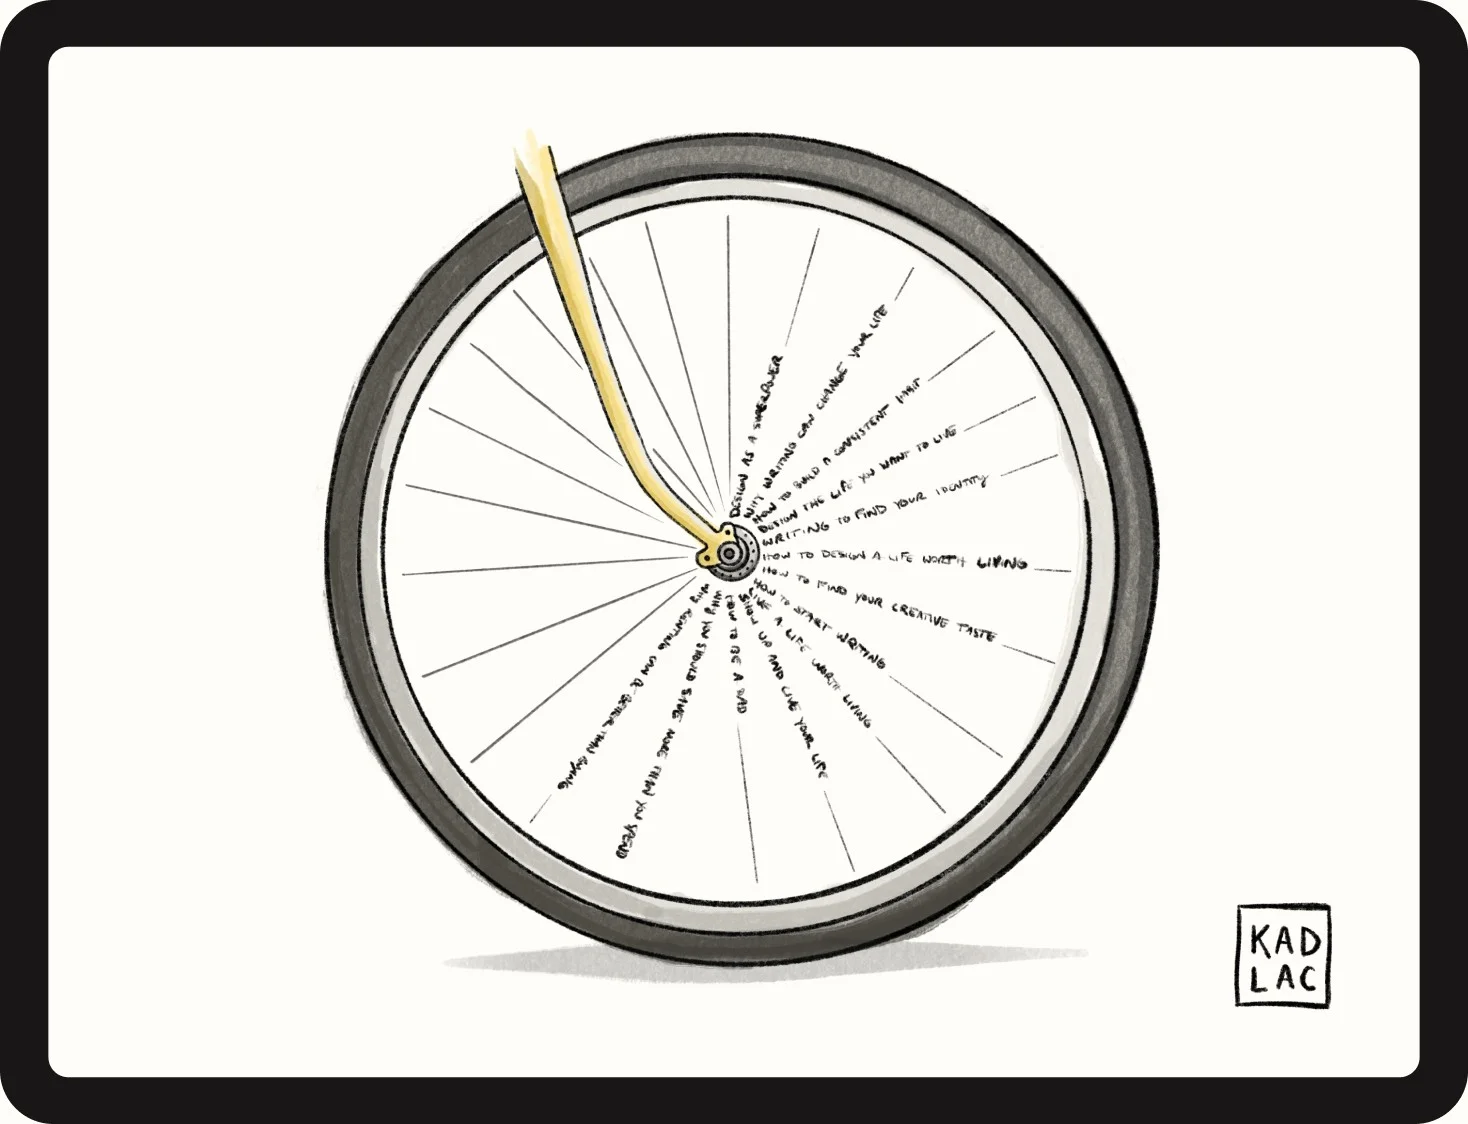
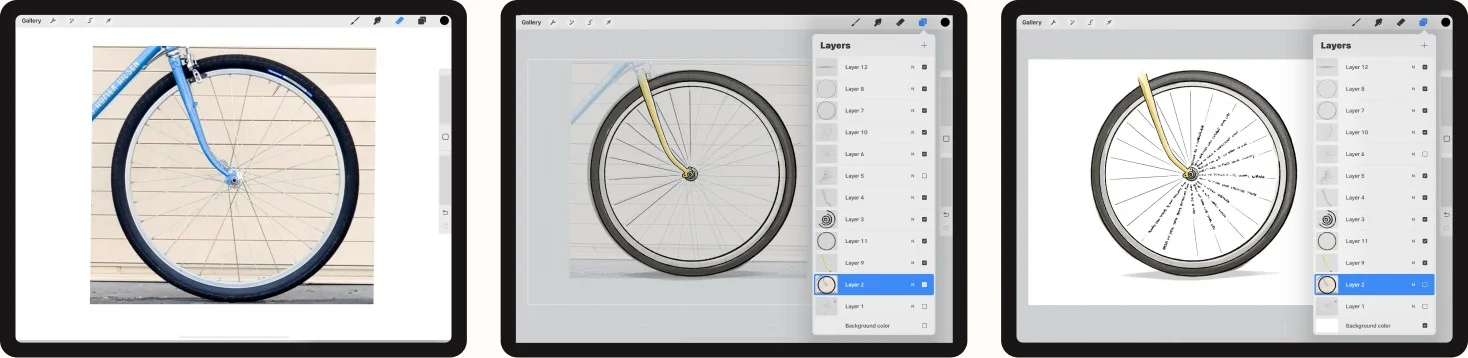
I love to bike, so I grabbed this bike wheel photo from my own bike, and gave it a sense of life. Like every image before, I illustrated the pencil drawing using a 6B pencil, then filled in some basic coloring in the spokes and the wheels around it.
The article it was for was about finding your creative alignment, and I thought a bike navigating the nooks of a street could be a great illustration for it.
The finishing touch was to write some phrases in a straight continuous line drawing as the spokes. I think the illustration benefitted from this unique concept, versus just being a simple wheel.
This is the magic in remixing illustrations this way. Finding your creative voice over time, and tweaking the physical elements with the imaginary world of our minds. This is the foundation for your digital painting exploration.
AI and stock photos will never be the same as drawing for yourself
I hope you’re feeling inspired to create art for yourself. By the time you read this, you’ll be able to use Artificial Intelligence (AI) to generate an image from a few words, based on existing art. Technology is moving quickly and it’s great to embrace it, but there’s nothing like drawing for yourself.
Still looking for inspiration? Check out six unconventional Procreate drawing ideas to spark your creativity.